For a king & a fairy princess

My last post got me a bit motivated to move things along another step in the kids bedroom. Actually it was less that, than the fact Miss E’s feet were hanging over the end of her toddler bed – a sure sign she was ready for a “proper big bed”!

So the last couple of weekends have been about furniture shuffling and a little shelf install. Fun times!

And version 4.6 of the kids room is…. here! And today it is tidy, which is as good as you’ll ever get from me. Styling to perfection is not going to happen despite my best intentions. So that creepy dark thing on the wall? It’s not a giant bug – it’s a peacock feather which looks perfectly charming in reality, it just doesn’t photograph well (or look particularly harmless in the middle of the night!).

0925_7144 0925_7145 0925_7146 0925_7147 0925_7149 0925_7150

Here’s how it looks from the lofty heights of King W’s bed (a bit scary to be honest when I’m up there making the bed, but he’s fine with it!):
0925_7151

And here’s my little fairy princess doing her best to untidy the room (which I totally am ok with because it tells me she loves hanging out in here!), and she’s super excited that Version 4.7 gets underway tomorrow with a “princess bed” pick up planned.

0925_7105Let’s hope she can hold that excitement for a while, because Mum’s gone and bought yet another thing that requires some Daddy DIY to get it functional. Stand by kings and princesses!


Going backwards to go forwards

I’ve been itching to get a progress update on here, because there has been a bunch of stuff going on with just little hints shared here and there.

But… there’s not a room in the house that doesn’t have that “work in progress” vibe. The front room (below – first sneaky peek of that progress!) just has a hint of it, with it’s bare walls and badly styled shelves, but every other way I look it’s far from subtle.

0909_7095

The dining area currently houses a cabinet destined to be the new bathroom vanity, along with a stack of chairs and cushions that used to belong in the lounge.

The lounge furniture is packed and stacked tight in the middle of the room because we intended to get onto painting the freshly plastered walls and ceiling much sooner than we have… (haven’t yet!).

The kids bedroom is a haphazard halfway point between building a loft bed but not quite got to rearranging the other furniture and artwork to work with the new layout…

0909_2015-09-08-09.47

The map prints from the lounge are leaning up against the wall in our bedroom, precariously close to kid-sized somersaulting on the bed feet.

0909_20150908

All that, and the arrival of spring is also making me freak out about the state of my kitchen cupboards and the contents of all wardrobes in the house. A massive declutter suddenly feels like a matter of urgency!

Plus, I miss this edition of the kids room. Why did they have to go and grow so quickly and need full size beds already?!

0603_after_kids-room

0603_after_kids-room1

In the meantime… we are actually crossing things off the list, and I know it’ll all come together and look fab again soon. Real soon… because I can’t stand it much longer!!!

The last of the wallpaper

Those of you with greater (really… much greater) than average powers of observation may have noticed something in my last post about our fancy new fireplace (which is still up there in my Top 2 list of best things this winter)… we no longer have wallpaper in our lounge.

Or the front bedroom.

Actually… there is NO WALLPAPER left in our entire house! In all the long renovation that this has been, that feels like quite an achievement.

It also feels like this has the potential to be the most mundane post of all time, but for posterity’s sake, I think I need to document “the final wallpaper removal” here. After 5 years of living the “dream” – although it only lasted 2 years in the “dream” dream?! – the end is in sight. And if only for myself and my great grandchildren one day, I’ma gonna keep at this until we’re done!

So… photos. Short and sweet. The lounge:

0703_50040703-08.18 0703-08.27And the front bedroom (formerly known as the green bedroom):0703_5008 0703-12.03

It seems everyone has a horror story or two about wallpaper stripping, but honestly, since we remembered there are such things as wallpaper steamers, it’s far from our worst reno experience. We did 80% of the lounge one Friday night, and finished that and the bedroom the next morning. It even works ok on painted paper, and makes very quick work of the backing paper that never, ever comes off with the top layer. It’s around $30 for a day’s hire – definitely a better option than various concoctions in spray bottles and fingernails.

So we’re living with less than perfect 50s plasterboard walls right now, but embracing the edgy kind of vibe while we have it…
0703_5073 0703-02.11Because I’ve just booked a plasterer in for next week!

Have a great weekend.

Hotter… colder… cold… hotter… hot!

Outside, the wind is howling, and the rain is lashing the window in violent gusts. Inside, I can hear the faint roar of logs burning, and I can feel a rosy warmth at my back. (And there the romance novel stops thank goodness!)

Each time I’ve arrived home today it’s been off with the jacket and hat and scarf, and on with… oh! Nothing! No more that big comfy, chunky cardy that’s only fit for home. Because, my friends…

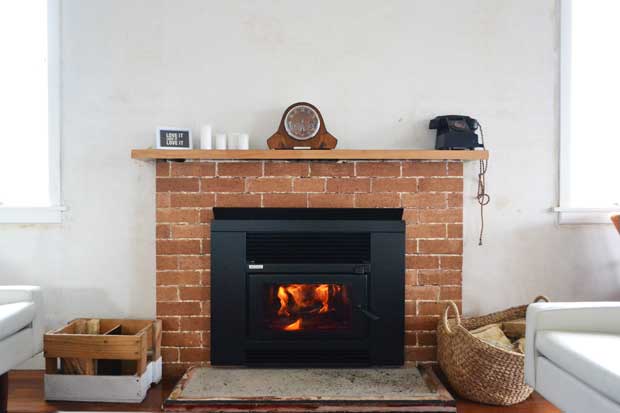
…We have warm! We have an efficient wood burner where once there was…

0603_4997

Ouch! Thankfully this stage was momentary, but I admit it was a little tough on my organised self. This room is the centre of our house in a literal sense, as well as a living sense. We walk through the lounge to go between the kitchen/dining area, and the bedroom/bathroom area. There is no avoiding it – even when it looks like it should be a no-go zone.

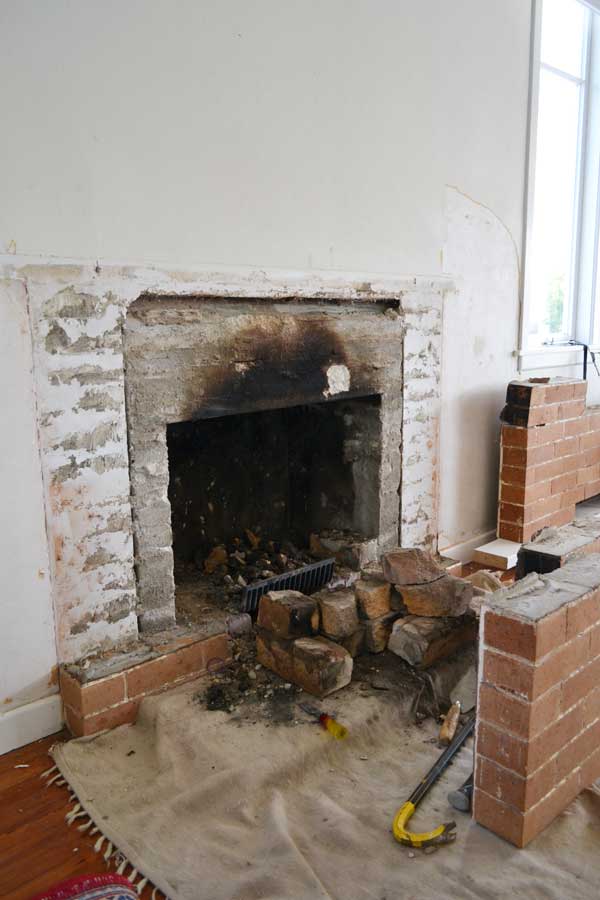
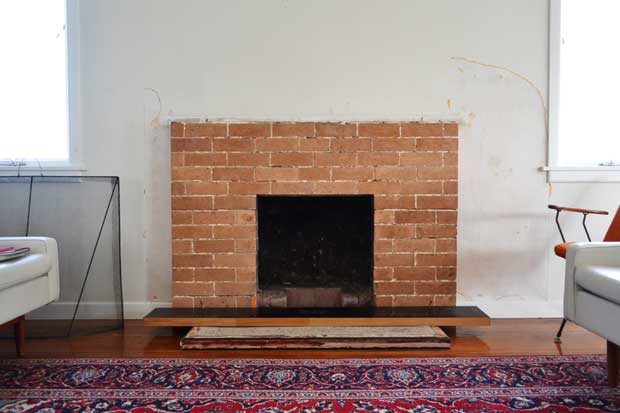
Anyway, back to where we started. Since we did away with that awful mosaic tiling back in 2011, our fireplace has looked like this:

0603_3773

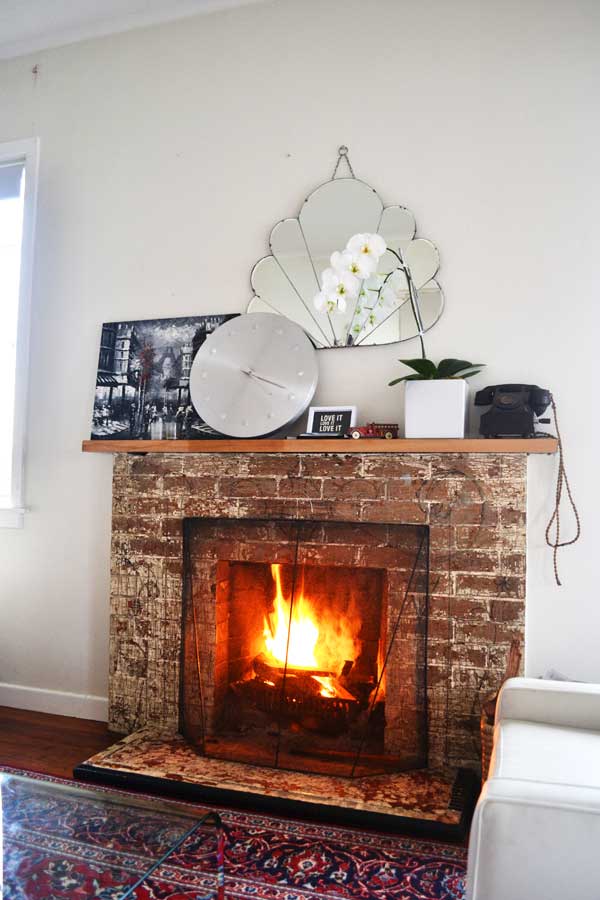
It gave us much, in the way of ambience and rustic style and a whole lot of love. But efficiency was lacking greatly. Sitting in the armchair right next to it was never close enough… there were many times when it probably looked like I was perched half on top of it in a bid to get some warm air! And I’ll be honest, it didn’t always look this glamorous – mostly it was all about poking it with a half burnt stick every few minutes to keep a little flame flickering. No way would it still be going after I popped out to pick up another bottle of cream, or drop kids at kindy.

And with rumours of law changes around allowing open fires… we knew we finally needed to do something about getting a more efficient source of heat.

Of course we looked into a heat pump. If you don’t have one, you’re well and truly in the minority, and absolutely missing out on being able to say gushing things about how “convenient” they are, and “so cheap!” and “oh I could never do without one”. So there must be something in them.

I lost track of how many quotes came in (they somehow all seemed to quote almost exactly the same model, and at exactly the same price?!) before we almost, almost said yes, we’ll do this. We’ll do it for the resale value, and the convenience (which are one and the same are they not?!).

But… what I really, so desperately wanted was not just for our living area to be toasty warm, but our WHOLE HOUSE! Would that really be too much to ask?!

Sadly though, no amount of pleading with these heat pump guys got them anywhere near saying yes, ok, we can place it here… or here… and it’ll be pretty effective in heating your whole house. They’re a one room only option.

Of course, there was another option to the tune of around $8000 – a fully ducted system delivering quality heat to every room we wanted at the flick of a switch. Ideal – except for the price.

And the other thing… we are a little attached to the romantic notion of a wood burner. And we knew if we had a heat pump as well, the fire would just never get lit. We’d tell ourselves it would, but of course it would just be… too hard… and completely pointless. Plus I’m suspicious of that “currently on hold” ban on open fireplaces sneaking it’s way into law without so much as a “hey I’m back!”, which would leave us with a useless hole in the wall.

So after all this indecision I was finally convinced by coming across a forum that discussed heat transfer kits and how they really are effective when used in conjunction with an efficient wood burner. Annnnnnd… with an April/May special on a 3 room heat transfer kit bought with any new Metro fireplace (which turned out to be the only brand of insert that would fit our current opening) it was looking like the better option all round. Sitting in the middle pricewise, but achieving my goal of a warm and dry house (not just a room!), and the bonus of no ongoing costs (we’ve never had a problem getting free firewood), it was a done deal. Decision made!

So, it was onto scrubbing up that fireplace to get ready for it’s fancy new insert! We have always intended to do something about the marker scrawls all over the brick (drawn as a guide for the mosaic pattern), as well as the mantel and hearth. None of the three were in great condition, but we’d got used to them… and knew it was going to be a messy job, so avoided it accordingly!

But the time had come… to set up an adult size play fort a sealed dust enclosure, and get to work.

0603_11.57 0603_4981

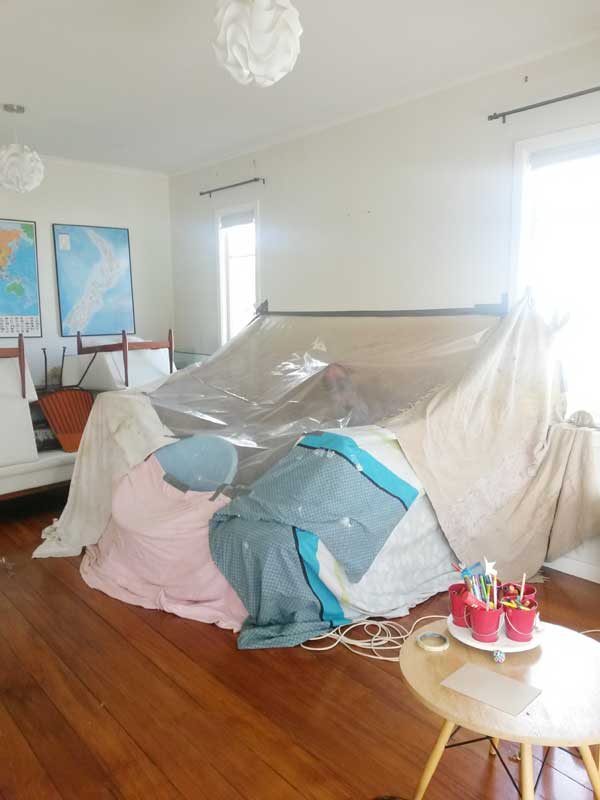
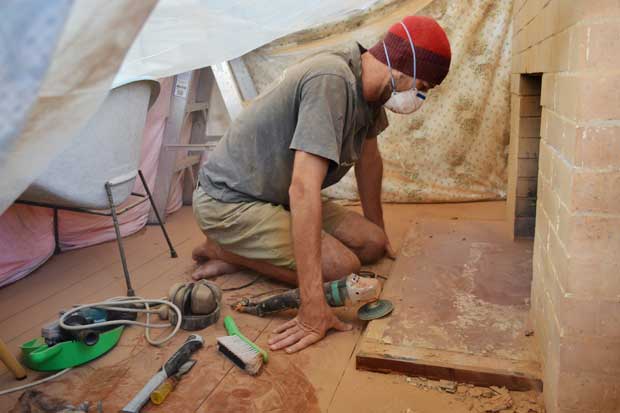
Despite our great precautions, this red brick dust has a mind of it’s own and did manage to find it’s way out, but a little deep breathing, a stress relieving cup of tea, and a whole lot of vacuuming, wiping, and mopping, and we were back to relative normal. And Andre had a good long shower!

And once the dust settled and the nerves calmed, we could see the plan to remove the marking all over the brick was rather successful! But it seemed the brick was a little less attached to the wall than we assumed, because of some chunks of mortar having broken off and weasled their way in between the wall and the surround over time.

0603_4994

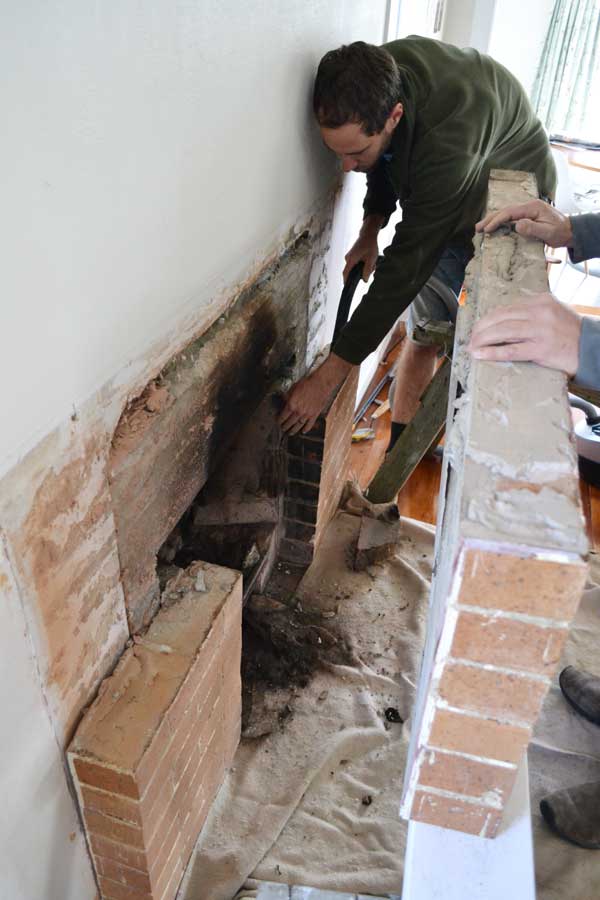
However, what was going to be a straightforward job of chipping that away and refixing the top half of the surround to the wall ended with dismantling the entire surround and a good portion of the firebricks inside.

0603_4997

Meaning… no fire at all until the new one was installed. I did have a little moment of sadness that we would never sit in front of our open fire again, but was glad I had “wasted” the entire previous evening reading a trashy novel right in front of the crackling flames!

Life Lesson #1: do nothing more often – you won’t regret it!

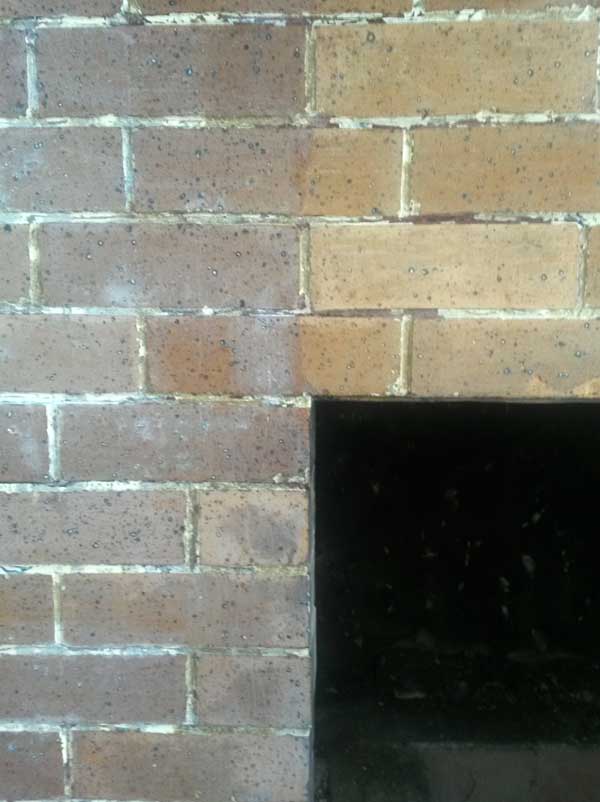
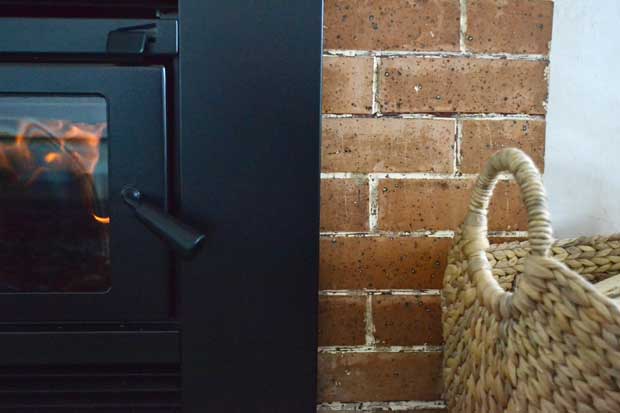
It all got put back together safely a few days later, and we could stand back and see how that brick was looking. My first reaction was “oh! it’s so orange!”. And actually I’m still thinking it’s rather orange… the grinding took off not just the drawn on pattern, but a layer of red stain/paint/mortar/something-or-other. And while I’m not a big fan of red (don’t ask me how it got to be the somewhat overriding colour in our lounge?!) I’m even less so of orange. Especially when it suddenly clashes with our rug.

0603_5001

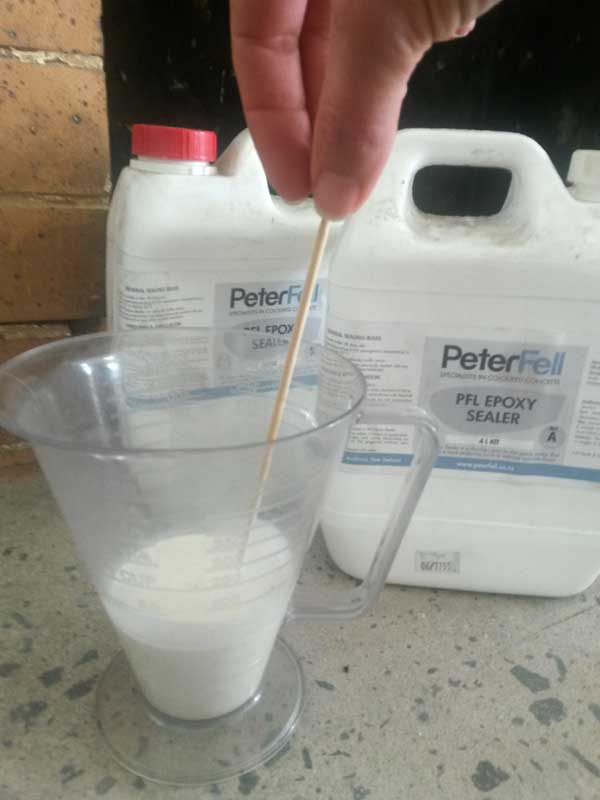
Sealing it with the same two part Peter Fell mix we used on our concrete floor helped tone down the brightness a little…

0603_11.13

0603_11.21

…And I made an executive decision to leave thinking about it until the new fire was put in, then live with it for a while and make a decision over time. Because what we do with the brick, is dependent on what we do with both the hearth, and the mantelpiece.

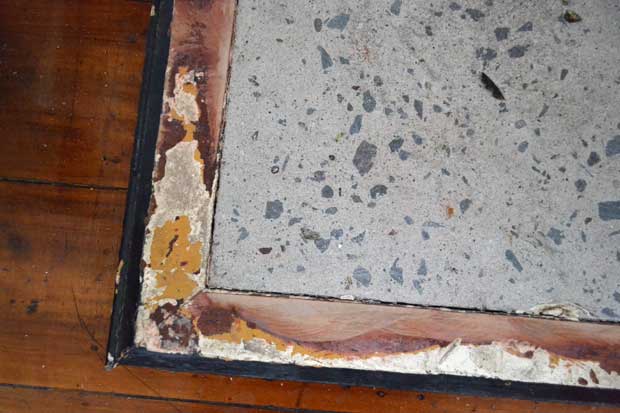
The mantelpiece had its front edge planed off a while back on a whim. A whim along the lines of “I wonder what kind of timber is under here?” We may replace this entirely with something non-combustible, so we can remove the heat deflector from off the top of the fire.

0603_5073

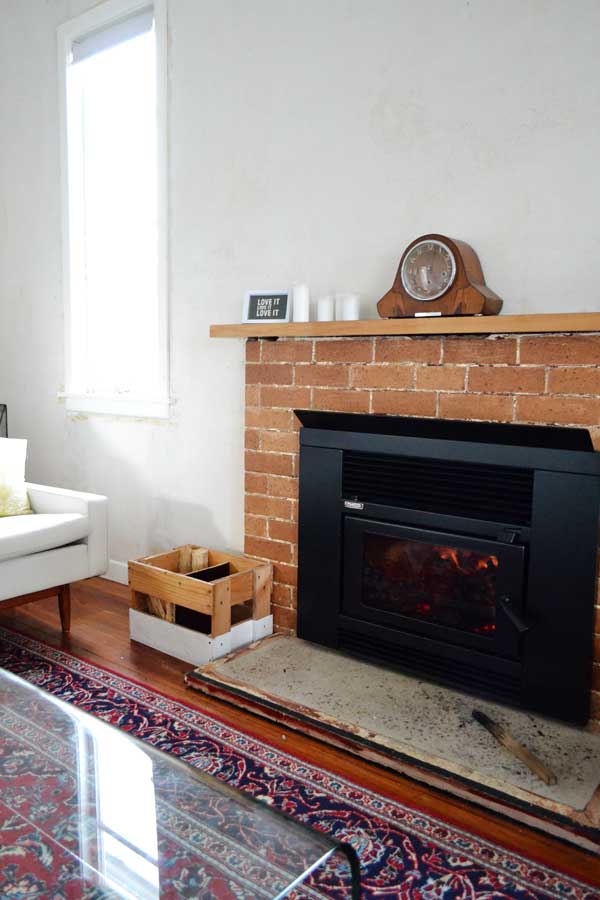
And the hearth is a little disastrous looking right now too – rough ground concrete which doesn’t play nicely with the brick, surrounded by some battered timber edging. Not sure what we’ll do about this one. It’ll take some sitting in front of the fire contemplating no doubt!

0603_5074

Anyway, we had the insert installation booked for one day last week (which meant about two weeks between enjoying our last open fire, and getting the new one in), and I was more than a little excited as the day approached. I was that annoying person that rings to check in the morning – “What time did you say you were coming?” Afternoon it was. Afternoon came, and was passing… and by 3.30pm I was thinking this doesn’t bode well for lighting our fire tonight. So one more phone call which eventually came back with the message that the installer had no record of our job on his schedule. Oh I could have howled! And just to rub it in, everything had been delivered the day prior, and we had to pretend like it was ok that we were making do with a picture on a box.

0603_5051

I knew, with the recent weather we’ve been having that that could have meant another two weeks delay before we could be scheduled in again. But the installer must have felt sorry for us and offered to come over and get it done in the middle of the only long weekend we get between April and October! Even though it was raining and slippery up there on the roof. Thanks Colin, thanks ever so much!

After a tedious afternoon of conditioning the fire by lighting two sheets of paper on the hour, every hour, for eight hours according to the instructions of the user manual (and the first time I’ve seen Andre read one, let alone pay any heed to it…?!) we finally got to light it for real the following day. A fire for the Queen’s birthday – how about that?!

0603_5075

And the next day I woke to a fire going (thanks Andre!), and came home to a fire going, and came home to a fire going again… oh this is the life!

0603_5071

0603_5070

And now, I’m off to sit with a trashy novel in front of the fire.

Life Lesson #2: Pay attention to Life Lesson #1 – you won’t regret it!

Pin of the day: Snap!

There’s something rather interesting about this picture, this space… it’s soooo similar to our own living space in many ways, but with some differences that make me think, oooh so that’s how it would look if we did that?!

The brick fireplace along the left wall, the wooden floorboards, the small window on the left and the big doors at the back, with sheer/pale curtains, the white pendant light… it’s the bones of our own living/dining area!

But look – a white painted fireplace! A comfy grey sofa! A round timber coffee table! All these things have crossed my mind to change up our space at some point, so I’m analysing this image in all kinds of ways right now.

Here’s to making some indoor spaces oh so liveable this winter!

Small spaces: A dream come true

Living a life on wheels isn’t everyone’s dream. But it’s mine!

Right now, thinking about how life on wheels could (or couldn’t) work frazzles my mind, but it’s there as a “one day” dream… It’s my fall back dream. And actually, it is a dream Andre & I have already had the great fortune to live, for a few blissful (ignoring the fairly regular tantrum days!) months. That was pre-kids, pre-home ownership, pre-proper career, pre-overinflated sense of responsibility.

Now, that over-inflated sense of responsibility gets in the way of such dreams, but I still have hope to quash that and just do it anyway.

Part of my plan is to devour every post and picture that encourages that dream!

This darling home on wheels by Tiny Heirloom, via my scandinavian home, has added a lot of determination. How could it not?! Creature comforts, and a sense of style are not forgotten!

Pin of the day: A vintage style shared kids room

I’ve been on a little pinning spree again this morning… I go for days without even opening Pinterest, and then I go a little mad pinning and scrolling furiously through bucket loads of things I’ve missed! (A bit like how I treat this blog… nothing for weeks on end, then… two posts in a week?!) How do you pin?! Are you like me, or a faithful daily pinner?

Whatever your pinterest style, what we would do without it I don’t know… And my favourite feature is the “Pssst! Looks like you’ve already pinned this!”- because without that my boards would be full of double-ups and even triple-ups! So many images catch my eye over and over, for good reason.

This was one that I tried to triple-pin this morning:

Amazing shared kids room

Via Lovely Life.

The abundant natural light, the giant map wall, the cute vintage beds, the greenery, the floors, the rug, the easy storage baskets under the bed… all of it! Love it.

Covering it all up, and a dad joke

Well hello there…glossing right over my long absence from keeping you updated on our progress, I have progress to share with you in spades. Or shovels actually – square front, because they’re the best for this job so I’m told.

0504-12.10

The last I clued you in on what we’ve been up to in the backyard, was when we transplanted the plum tree from it’s corner of the odd little triangle of deck, and up into the more deserving and lofty place of the biggest planter we could heft down the stairs and across the backyard.

I’m pleased to say it survived, and I had high hopes when we got to enjoy a good spring bloom, but sadly there were only a small handful of meagre plum offerings. Uprooting an old tree definitely interferes with it’s nervous system. Hopefully next summer it’ll be feeling more up to production tempo again.

Pretty ain’t it?

0504_4498

But not so pretty… the weeds growing in every nook and cranny of the patchwork of old and new concrete, and ugly stained timber decking.

What to do….? Clearly laying ready lawn over top is not a good idea.

While we didn’t hate the concrete part, the odd triangle of deck in the back right corner really didn’t fit in with my vision of a comfortable, cosy, and relaxing back yard. What I really wanted to do was turn the concrete into crazy paving, and then cover up the deck. But apparently this was not achievable without seriously annoying the neighbours with a concrete saw for weekends on end, and the result unpredictable at best but leaning heavily towards disaster.

Would you believe we even contemplated ripping out the decking and filling the void with concrete so at least we’d be back to one simple surface? But that would have brought all sorts of retaining nightmares and probably have involved talking to the council. Not ideal.

So. “Cover it all up!” was the cry. White pebbles was the answer.

Until we saw the price. And realised that to do it properly we’d need to first invest in what the kids have deemed “honeycomb”.

“Honeycomb” is otherwise known as Natural Paving. There are various versions of it, and I forget quite why we chose this in the end, although most were priced pretty comparably, and do the same job. Which is to provide stability for a large area of pebbles. It holds them in place, and makes them easier to walk on. An added bonus is that it makes it hard for kids to dig around in them and throw bucket loads over the back fence and generally create havoc after you’ve gone to great lengths to rake it all out nice and smooth and level. Yep we’ll have some of that.

At $32 a sheet, and needing a total of 31 sheets, it got us almost to $1000 in one transaction. Scary stuff. But at least it was straightforward.

Pebbles was not so much. First there was giving up the dream of white pebbles, because that was looking like a few too many digits after the dollar sign. But mainly because once I got beyond that by telling myself they’d only be hard to keep looking good anyway, I couldn’t for the life of me make comparisons between pebbles and prices and suppliers thereafter. I was good at maths before I divided my brain in half twice by producing two offspring (leaving me with a quarter of my original… just enough to work that one out) but trying to compare these pebbles priced at so much per m3 with these different but supposedly the same pebbles at so much per tonne… way too much.

So what is one to do but go by looks then..?!

0504-01.49

Exhibit A: 4 different pebble samples from 3 different suppliers

I liked the look of the “Hoki Poki Small” from Daltons, and within days a truck dumped a 1.5m3 mountain in front of the garage door.

0504-12.10a

But meanwhile… we laid all the “honeycomb” and congratulated ourselves on moving one step further so efficiently (it was super quick to lay), only to spend the next few days wondering if perhaps we needed some kind of drainage underneath…

0504_4315

0504_4318

A wash down of my pebble samples left water sitting in the matting, with nowhere to drain to, and a quick phone call to Natural Paving confirmed that yes it was absolutely necessary to have at least 50mm of drainage metal underneath. The webbed material on the underside of the honeycomb is more for weed control. Nevermind that we’d edged off the entire yard allowing only for the thickness of the matting plus 10-15mm for pebbles on top of that. We didn’t have 50mm. At least not without copious frustration.

Andre’s day time job came in handy once again as he sussed out more advanced drainage materials than GAP 20, eventually coming across some kind of geotextile called “bidim” from Geofabrics. It has hydraulic properties which makes it ideal for use for drainage and filtration applications. Oh really? And how thick is it did you say? Oh about 2mm. Give or take 1mm!!

Laying it meant taking up the honeycomb row by row and replacing it over the top as we unrolled the bidim, so we didn’t mix up our jigsaw and get ourselves in a complete pickle.

0504_4322

0504-07.12

With that done, I spent most of a precious childless Friday moving barrows of Hoki Poki from here to there. Blisters and splinters aside, it was a good feeling to get to this point.

0504_145748I left off with it all dumped in piles where the wheelbarrow got the better of me and tipped off my wobbly ramp, too exhausted to rake it around, and definitely not able to manhandle that half-built playhouse structure around to finish off the job.

0504-03.07Andre got it done the next day, and after a good wash down of the dusty pebbles, it was looking pretty fine!

0504_4354We over ordered by a small pile of pebbles, and these have been fun for the kids (to throw around by the bucket load) but will get bagged up and used for top ups when necessary.

0504_4358 0504_4359Besides this “cover up” we’ve been busy in the backyard for most of the summer with adding timber to the front side of the planter wall on the deck, and to the side alongside the stairs. I’ve spent a bit of time in the garden up the side, trying to get some shade loving plants established, and helping the jasmine along with a better growing frame, and a couple of extra plants. We also filled in and painted the “half wall” at the garage side of the backyard.

Busy. But these leaps of progress are so worth it!

0610_1867

Once you can stop and look back… and once you know there are just a couple more things left on the list. We have a playhouse to finish obviously, and then a line up of more concrete pipe planters waiting to move into position along the back fence and break the monotony of brown with some much needed green!

I’ll leave you with this:

After 5 years of fatherhood Andre is getting pretty heavily involved in the Dad-joke Club, but one of his latest (pilfered from somewhere no doubt) is actually not bad: “Did you have a good weekend or do you own your own home?”

Small spaces: Traditional vs contemporary

A Pinterest trawl this morning stopped me at this remodeled barn type house. Anything that says small and cosy has me peering closer…

We love how this #kitchen fits into the house like a puzzle piece. www.remodelworks.com

And despite my ignorance as to what this one is all about – it links to here, but I can’t spot it – it has me intrigued with it’s well executed combo of traditional style and contemporary fitout.

It would make a perfect mini flat out the back of someone’s big ol’ house, or a cosy holiday house in the woods. Amp up the contemporary style and it would look equally as at home near the beach.

I love the porch-tree-swing, the farmhouse table right alongside the kitchen, and the built in seating that tucks right up to the shelving and the windows. Gorgeous!

Summer lovin’

What an absolutely stunning summer we are enjoying here in Auckland this year! It’s hot, dry and the locals will agree that it’s not even humid!

We were lucky to spend a few glorious days at a bach on Waiheke Island. So, this was our summer – beach fossicking, swimming, stunning views, and a few motorbike rides around the winding roads!

0121_3795 0121_5065 0121_5061 0121_5058 0121_38720121_3865 0121_3845 0121_3831 0121_3829 0121_3817 0121_3806

But we are home now, and back into the DIY groove that has been off since our last big project. Of course this time of year lends itself to the outdoors, so we are tackling the backyard once again, with a pergola/playhouse in the pipeline. Pipeline – it’s a clue! Stand by…